Ask about this topic
Answers come from this page's notes only — no live AI, no extra API cost.
Core concept
Design Review Interviews
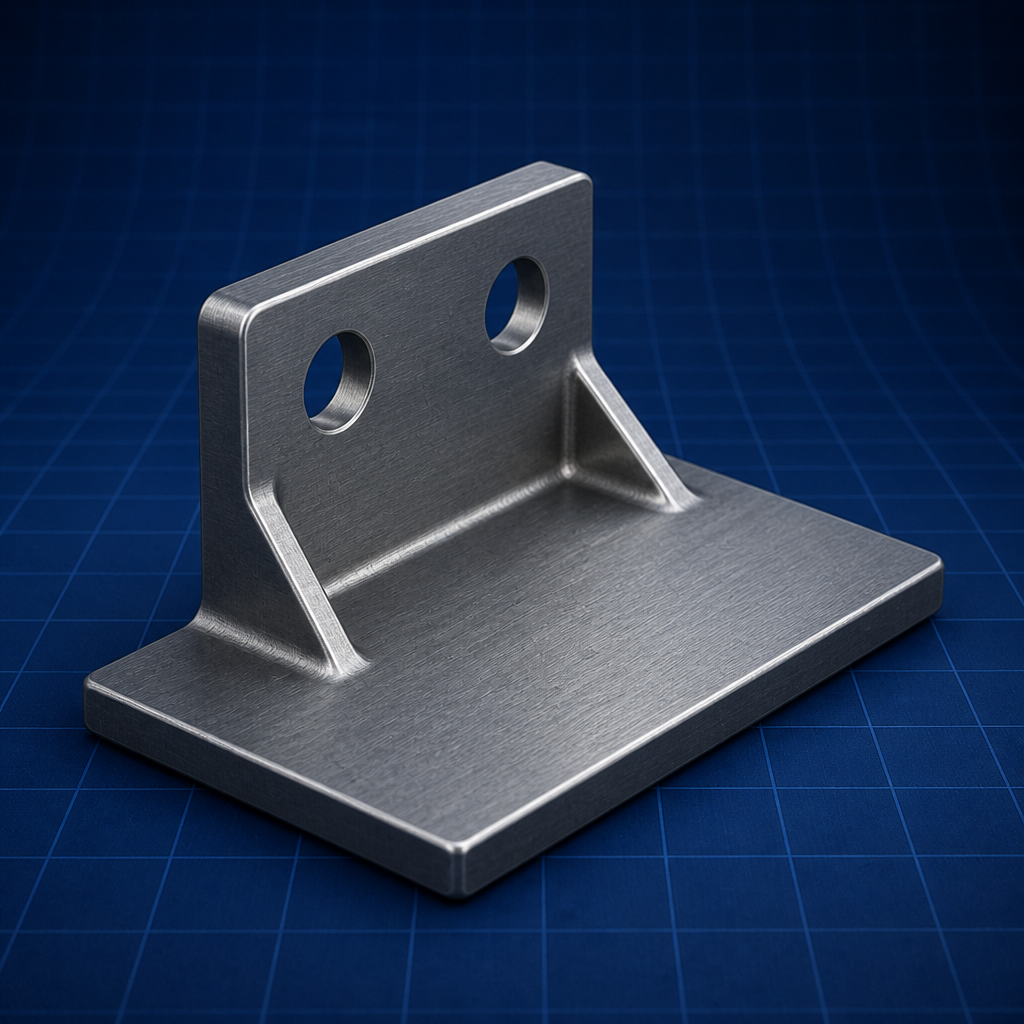
Design-review interviews ask why you chose material, thickness, welds, fasteners, tolerances, and processes.
29 min12 Interview12 GATEGATEInterview
What you'll learn in this topic
- 1Interviewers test engineering judgment — material, thickness, process, cost, safety — not only calculations
- 2Always compare at least one serious alternative and name the trade-off you accepted
- 3Separate strength-driven choices from manufacturability-driven choices
- 4Cite standards when relevant (IS / ISO / ASME / AWS) and name the governing failure mode
Key Formulas
Important equations & their meanings
Worked Examples
Step-by-step solved problems
- 1Trade-off sentence
- 2Conceptual check — Design Review Interviews
Common Mistakes
Avoid these errors in exams & interviews
- Answering with only “as per standard” and no requirement/options/trade-off
- Defending thickness with no load case
- Ignoring manufacturability or inspection
Practice Questions
Strengthen your concepts with questions
24+Practice Questions
Interview Questions
Most asked interview problems
12Interview Questions
GATE Questions
Previous year GATE questions
12GATE Questions
Applications in real world
- ShaftsPower transmission design
- GearsTooth strength & wear checks
- JointsBolted and welded connections
- BearingsLife and lubrication selection
Visual concept
Load Case
Stress Check
Factor of Safety
Sized Part
Design size from stress with a clear factor of safety.
Recommended Book
Design of Machine ElementsVB Bhandari
Read: Syllabus unit
University exams
Important Topic
Industry relevance
High
Concept difficulty
Hard
Average time
29 min
Scope in B.Tech and GATE syllabus
Use this topic’s Interview bank as a drill set before placement drives — expand each model answer with a project example.
Notation and sign conventions
Symbol and sign-convention guide for the equations listed under Key relations & formulas.
Keep SI units consistent end-to-end (do not mix mm with m, or N with kN, in one substitution).
Symbol guide:
• — justify with code / uncertainty
• — justify with code / uncertainty
Sign convention: lock the textbook’s positive sense (force, moment, rotation, heat, or flow) before substituting. A correct symbolic setup still earns method marks in most Indian university papers even if arithmetic slips.
Write relations with symbols exactly as in Design of Machine Elements — VB Bhandari before substituting numbers.
Design and analysis considerations (long form)
In practice, design and analysis are iterative. First pass sizes for safe stress, second pass checks stiffness/functional limits, third pass checks fatigue/wear/reliability where relevant, and final pass aligns with manufacturing capability. If any pass fails, return to geometry/material/layout and repeat. This loop is normal engineering, not rework failure.
A critical design reminder is: Always compare at least one serious alternative and name the trade-off you accepted. When this is ignored, nominally "safe" designs still fail by misalignment, looseness, pitting, thermal drift, or assembly interference.
Where a tertiary relation exists (Weld throat / bolt stress area sized to load, then round to shop standard), use it as a screening tool during concept comparison before detailed CAD/FEA. This saves time by rejecting weak options early.
Always close analysis with a reasoned standard-size choice and one-line trade-off note (mass, cost, safety margin, manufacturability). This is what turns analysis into design.
Assumptions, uncertainty, and reliability thinking
Assumptions are not formality text; they define the boundary where your answer is valid. Explicitly state loading character (static/variable/shock), material behavior (linear elastic/yielding), geometry idealisation, and boundary conditions. If any of these are wrong, a numerically neat answer can still be physically wrong.
Design factor and reliability are related but not identical. Factor of safety compares modeled stress to strength at a selected limit state; reliability addresses population-level survival under variability in load, properties, manufacturing tolerance, and usage. High reliability needs both correct model selection and controlled process variation.
A strong exam/interview answer includes one uncertainty statement: "This result is sensitive to ___; if that input increases by X%, the design margin changes by ___." Even a qualitative statement shows engineering maturity beyond plug-and-chug calculation.
Manufacturing, inspection, and lifecycle perspective
Machine Design quality improves sharply when manufacturing and inspection are considered from day one. Overly tight tolerances, inaccessible welds/bolts, impossible tool paths, or unavailable materials can break a design that is analytically safe. Design decisions must therefore be compatible with process capability and inspection method.
For lifecycle readiness, include assembly order, field service access, common failure symptoms, and replacement strategy. If a part is likely to wear or fatigue, design for inspection interval and repair path. Interviewers repeatedly test this practical layer because it separates textbook understanding from deployable engineering.
Keep this lifecycle anchor in mind: Separate strength-driven choices from manufacturability-driven choices.
Exam and interview mastery roadmap
To reach mastery level, prepare in three tracks: (1) symbolic derivation and assumption recall, (2) timed numerical drills with SI/unit discipline, and (3) one-minute oral justifications for each major design choice. Most students prepare only track (2), which limits depth in viva and interviews.
For every solved problem in design review interviews, add a post-solution note: governing mode, why chosen relation is valid, common mistake avoided, and what would change under higher load/speed/temperature. This builds transferable reasoning that works across chapters (shafts, joints, gears, bearings, springs).
A practical weekly routine: one concept recap, two medium numericals, one mixed-design question, and one oral review simulation. This pattern steadily builds the 5-6 page equivalent depth you asked for and makes the Scope & Concept stage worth reading.
Practical interpretation and decision quality
Students often lose marks and confidence by stopping at substitution. Better practice is to interpret the result: Is magnitude realistic? Is sign/direction physically valid? Does this answer support a safe and practical engineering decision?
Secondary relation for cross-check: . Use it to validate trend and consistency under a second viewpoint.
Design/application reminder: Always compare at least one serious alternative and name the trade-off you accepted.
Exam, viva, and note-making mastery
To make this app genuinely note-worthy for students, each topic should support three outcomes: fast revision, full-mark written answers, and clear viva explanations. Your notes should therefore include assumptions, governing steps, common mistakes, and one short "how to explain this in 30 seconds" summary.
Recommended personal note format: (1) definition in your own words, (2) 2-3 governing relations, (3) assumption list, (4) one worked template, (5) common mistake and correction. This format improves repeat visits because the page becomes usable right before tests and interviews.
Use spaced revision: day-1 read, day-3 recall, day-7 timed problem, day-14 oral explanation. That cycle turns page-reading into durable skill.
Assumptions and validity limits
State assumptions explicitly before using any relation for design review interviews — steady state, uniform properties, linear elastic material, ideal gas, incompressible flow, etc., as applicable.
Wrong assumptions invalidate the entire solution even when the formula is correct. In Machine Design viva and GATE descriptive questions, listing valid assumptions often earns separate marks.
Step-by-step problem approach
1. Read the question and list given data with SI units (common in Machine Design papers).
2. Draw a neat labelled diagram where applicable — examiners in Indian universities award diagram marks even when arithmetic slips.
3. Identify which relation from this topic applies to design review interviews.
4. Use equation 1: Answer frame: Requirement → Options → Selection reason → Trade-offs.
5. Use equation 2: .
6. Substitute values, compute, and verify units and sign (direction).
7. State conclusion in one line — e.g. safe/unsafe, stable/unstable, feasible/infeasible.
2. Draw a neat labelled diagram where applicable — examiners in Indian universities award diagram marks even when arithmetic slips.
3. Identify which relation from this topic applies to design review interviews.
4. Use equation 1: Answer frame: Requirement → Options → Selection reason → Trade-offs.
5. Use equation 2: .
6. Substitute values, compute, and verify units and sign (direction).
7. State conclusion in one line — e.g. safe/unsafe, stable/unstable, feasible/infeasible.
Applications & exam relevance
Design Review Interviews appears in shafts, keys, bearings, springs, gears, and fasteners. In Indian mechanical curricula this topic is tested because it connects theory to safe sizing of mechanical components.
GATE and semester exams often combine design review interviews with earlier units — revise prerequisites before attempting mixed problems.
Industry interview panels sometimes ask: "Where did you use design review interviews?" — answer with a lab, mini-project, or plant visit example if possible.
Quick revision checklist
Before attempting design review interviews problems, confirm you can:
1. Interviewers test engineering judgment — material, thickness, process, cost, safety — not only calculations
2. Always compare at least one serious alternative and name the trade-off you accepted
3. Separate strength-driven choices from manufacturability-driven choices
4. Cite standards when relevant (IS / ISO / ASME / AWS) and name the governing failure mode
2. Always compare at least one serious alternative and name the trade-off you accepted
3. Separate strength-driven choices from manufacturability-driven choices
4. Cite standards when relevant (IS / ISO / ASME / AWS) and name the governing failure mode
Revise the solved examples in Design of Machine Elements — VB Bhandari and one previous-year GATE or university paper for this unit.
Advanced problem-solving framework
Use this sequence for long-form mastery and repeatable scoring:
1. Identify objective, system boundary, and required output.
2. Write all givens in SI units and classify each as measured, assumed, or estimated.
3. Choose the governing model and relation (the key relation listed above) with one-line justification.
4. Solve symbolically first to catch structural mistakes early.
5. Substitute values with careful unit tracking.
6. Cross-check by sign, order of magnitude, and limiting case.
7. Write a short engineering conclusion tied to safety, performance, reliability, or cost.
1. Identify objective, system boundary, and required output.
2. Write all givens in SI units and classify each as measured, assumed, or estimated.
3. Choose the governing model and relation (the key relation listed above) with one-line justification.
4. Solve symbolically first to catch structural mistakes early.
5. Substitute values with careful unit tracking.
6. Cross-check by sign, order of magnitude, and limiting case.
7. Write a short engineering conclusion tied to safety, performance, reliability, or cost.
Next, solve one "variant version" of the same problem by changing one assumption (loading type, losses, property constancy, boundary condition, or uncertainty level). This builds transfer ability — essential for difficult exams where numbers and wording are changed deliberately.
Create a reusable answer template in your notes:
Given | Required | Model | Assumptions | Derivation | Substitution | Validation | Conclusion.
Using this structure repeatedly improves speed without reducing depth.
Given | Required | Model | Assumptions | Derivation | Substitution | Validation | Conclusion.
Using this structure repeatedly improves speed without reducing depth.
For viva/interviews, convert your written method into a 45-second explanation format:
"Objective -> model selected -> key assumption -> result -> practical implication."
This makes your answers concise and technically credible.
"Objective -> model selected -> key assumption -> result -> practical implication."
This makes your answers concise and technically credible.
Exam, interview, and note-making strategy
To make this topic genuinely reusable, maintain notes in four blocks: concept summary, assumptions checklist, solved template, and common error-correction logic. This transforms passive reading into active revision material for class tests, semester exams, GATE-style practice, and interviews.
A practical weekly cycle:
- Day 1: read and annotate the topic.
- Day 3: solve one moderate numerical from memory.
- Day 5: give a 60-second oral explanation.
- Day 7: solve one mixed problem integrating this topic with a prerequisite.
- Day 14: do a timed review to test retention.
- Day 1: read and annotate the topic.
- Day 3: solve one moderate numerical from memory.
- Day 5: give a 60-second oral explanation.
- Day 7: solve one mixed problem integrating this topic with a prerequisite.
- Day 14: do a timed review to test retention.
For interview readiness, prepare concise answers to:
1. Where is this used in real engineering?
2. Which assumption is most risky if wrong?
3. How do you sanity-check the result quickly?
4. What trade-off does this result influence?
1. Where is this used in real engineering?
2. Which assumption is most risky if wrong?
3. How do you sanity-check the result quickly?
4. What trade-off does this result influence?
These four questions are asked repeatedly in technical panels, and practicing them creates confidence.
Use this page as a living notebook: append class doubts, lab observations, previous-year tricks, and personal mnemonics. That personalization is what turns a study page into a repeat-visit resource students trust.
Industry scenarios and decision context
Engineering decisions are made under constraints: deadline, budget, material availability, process capability, safety requirements, and maintenance realities. So while solving design review interviews, do not treat the answer as "final truth" without context. The numerical output is a decision input, not the decision itself.
Ask these context questions after every solved example:
- If load uncertainty increases, does design margin remain acceptable?
- If manufacturing tolerance drifts, will performance degrade critically?
- If operating temperature/humidity changes, are properties still valid?
- If maintenance is delayed, what failure mode appears first?
- If load uncertainty increases, does design margin remain acceptable?
- If manufacturing tolerance drifts, will performance degrade critically?
- If operating temperature/humidity changes, are properties still valid?
- If maintenance is delayed, what failure mode appears first?
Students who practice contextual questioning develop judgment faster and perform better in internships, design tasks, and technical interviews. This context-first style is a major retention driver because learners see immediate real-world value.
Long-form revision worksheet
Use this worksheet when preparing notes:
A) One-paragraph concept explanation in your own words.
B) Symbol and units table for key variables.
C) Validity limits and assumptions list.
D) One standard solved pattern with all steps.
E) One variant problem where an assumption changes.
F) One industry-use explanation with failure consequence.
G) Three common mistakes and their correction rules.
A) One-paragraph concept explanation in your own words.
B) Symbol and units table for key variables.
C) Validity limits and assumptions list.
D) One standard solved pattern with all steps.
E) One variant problem where an assumption changes.
F) One industry-use explanation with failure consequence.
G) Three common mistakes and their correction rules.
If you can fill all seven blocks without external help, your topic depth is strong enough for repeat use and long retention. If not, revisit the corresponding section and strengthen the missing block.
This structured worksheet approach is intentionally longer than quick revision notes because it is designed for durable mastery. It supports exactly the product goal you mentioned: students should keep coming back because the page is complete enough to build serious notes.
Introduction
Product and manufacturing interviews rarely stop at a formula. Reviewers want to hear how you pick steel vs aluminium, weld process, bolt grade, and whether a feature exists for strength or shop convenience.
Scope in B.Tech and GATE syllabus
Use this topic’s Interview bank as a drill set before placement drives — expand each model answer with a project example.
Key relations & formulas
Answer frame: Requirement → Options → Selection reason → Trade-offs
(justify with code / uncertainty)
Weld throat / bolt stress area sized to load, then round to shop standard
(justify with code / uncertainty)
Weld throat / bolt stress area sized to load, then round to shop standard
Notation and sign conventions
Symbol and sign-convention guide for the equations listed under Key relations & formulas.
Keep SI units consistent end-to-end (do not mix mm with m, or N with kN, in one substitution).
Symbol guide:
• — justify with code / uncertainty
• — justify with code / uncertainty
Sign convention: lock the textbook’s positive sense (force, moment, rotation, heat, or flow) before substituting. A correct symbolic setup still earns method marks in most Indian university papers even if arithmetic slips.
Write relations with symbols exactly as in Design of Machine Elements — VB Bhandari before substituting numbers.
Fundamentals and definitions
Judgment questions span materials, welding, fasteners, DFM, GD&T, FEA, and reliability. Treat FoS, weld size, and bolt grade as decisions with evidence.
Governing relations in practice
If challenged “why not cheaper/thinner?”, re-check the governing constraint before conceding.
Scope and design intent (extended)
Design Review Interviews should be studied as a complete machine-element decision process, not as an isolated equation card. In real design reviews, the first question is usually "what is the function and failure consequence?" and only then "what formula did you use?" This means scope includes load path understanding, material/process constraints, inspection feasibility, assembly access, and service conditions.
For GATE and semester exams, students often solve only the numerical centerline and miss marks on assumptions, sign conventions, and interpretation. For industry interviews, the reverse happens: interviewers accept approximate numbers if your reasoning chain is correct. So your preparation should include both styles: exact symbolic steps and short design-justification language.
Use this checklist before finalising any design review interviews answer: requirement, governing mode, governing relation, assumptions, dimension choice, standards link, and verification close-out. A mature answer is one where another engineer can audit each decision without guessing hidden assumptions.
Concept hierarchy and first-principles framing
Every design review interviews derivation sits on a hierarchy: physics model → idealisations → governing equation → engineering correction factors → design decision. If you jump directly to substitution, you lose control over validity. Keep the hierarchy explicit in notes and in viva responses.
Typical primary relation for this topic is Answer frame: Requirement → Options → Selection reason → Trade-offs. Read it as a relationship among measurable engineering quantities, not as algebraic decoration.
A second relation such as usually appears when loading becomes combined, geometry is non-ideal, or performance constraints are added.
Concept anchor: Interviewers test engineering judgment — material, thickness, process, cost, safety — not only calculations.
Design and analysis considerations (long form)
In practice, design and analysis are iterative. First pass sizes for safe stress, second pass checks stiffness/functional limits, third pass checks fatigue/wear/reliability where relevant, and final pass aligns with manufacturing capability. If any pass fails, return to geometry/material/layout and repeat. This loop is normal engineering, not rework failure.
A critical design reminder is: Always compare at least one serious alternative and name the trade-off you accepted. When this is ignored, nominally "safe" designs still fail by misalignment, looseness, pitting, thermal drift, or assembly interference.
Where a tertiary relation exists (Weld throat / bolt stress area sized to load, then round to shop standard), use it as a screening tool during concept comparison before detailed CAD/FEA. This saves time by rejecting weak options early.
Always close analysis with a reasoned standard-size choice and one-line trade-off note (mass, cost, safety margin, manufacturability). This is what turns analysis into design.
Assumptions, uncertainty, and reliability thinking
Assumptions are not formality text; they define the boundary where your answer is valid. Explicitly state loading character (static/variable/shock), material behavior (linear elastic/yielding), geometry idealisation, and boundary conditions. If any of these are wrong, a numerically neat answer can still be physically wrong.
Design factor and reliability are related but not identical. Factor of safety compares modeled stress to strength at a selected limit state; reliability addresses population-level survival under variability in load, properties, manufacturing tolerance, and usage. High reliability needs both correct model selection and controlled process variation.
A strong exam/interview answer includes one uncertainty statement: "This result is sensitive to ___; if that input increases by X%, the design margin changes by ___." Even a qualitative statement shows engineering maturity beyond plug-and-chug calculation.
Manufacturing, inspection, and lifecycle perspective
Machine Design quality improves sharply when manufacturing and inspection are considered from day one. Overly tight tolerances, inaccessible welds/bolts, impossible tool paths, or unavailable materials can break a design that is analytically safe. Design decisions must therefore be compatible with process capability and inspection method.
For lifecycle readiness, include assembly order, field service access, common failure symptoms, and replacement strategy. If a part is likely to wear or fatigue, design for inspection interval and repair path. Interviewers repeatedly test this practical layer because it separates textbook understanding from deployable engineering.
Keep this lifecycle anchor in mind: Separate strength-driven choices from manufacturability-driven choices.
Exam and interview mastery roadmap
To reach mastery level, prepare in three tracks: (1) symbolic derivation and assumption recall, (2) timed numerical drills with SI/unit discipline, and (3) one-minute oral justifications for each major design choice. Most students prepare only track (2), which limits depth in viva and interviews.
For every solved problem in design review interviews, add a post-solution note: governing mode, why chosen relation is valid, common mistake avoided, and what would change under higher load/speed/temperature. This builds transferable reasoning that works across chapters (shafts, joints, gears, bearings, springs).
A practical weekly routine: one concept recap, two medium numericals, one mixed-design question, and one oral review simulation. This pattern steadily builds the 5-6 page equivalent depth you asked for and makes the Scope & Concept stage worth reading.
Concept expansion for serious preparation
Design Review Interviews must be learned beyond definition level if you want repeat usage and long-term retention. In Machine Design, high-scoring and interview-ready students can explain not just "what the relation is" but also "why it applies, when it fails, and how the result changes when assumptions shift."
Anchor relation: Answer frame: Requirement → Options → Selection reason → Trade-offs. Treat this as a model of physical behavior, then test boundaries before trusting the final value.
Core insight to retain: Interviewers test engineering judgment — material, thickness, process, cost, safety — not only calculations.
Practical interpretation and decision quality
Students often lose marks and confidence by stopping at substitution. Better practice is to interpret the result: Is magnitude realistic? Is sign/direction physically valid? Does this answer support a safe and practical engineering decision?
Secondary relation for cross-check: . Use it to validate trend and consistency under a second viewpoint.
Design/application reminder: Always compare at least one serious alternative and name the trade-off you accepted.
Exam, viva, and note-making mastery
To make this app genuinely note-worthy for students, each topic should support three outcomes: fast revision, full-mark written answers, and clear viva explanations. Your notes should therefore include assumptions, governing steps, common mistakes, and one short "how to explain this in 30 seconds" summary.
Recommended personal note format: (1) definition in your own words, (2) 2-3 governing relations, (3) assumption list, (4) one worked template, (5) common mistake and correction. This format improves repeat visits because the page becomes usable right before tests and interviews.
Use spaced revision: day-1 read, day-3 recall, day-7 timed problem, day-14 oral explanation. That cycle turns page-reading into durable skill.
Assumptions and validity limits
State assumptions explicitly before using any relation for design review interviews — steady state, uniform properties, linear elastic material, ideal gas, incompressible flow, etc., as applicable.
Wrong assumptions invalidate the entire solution even when the formula is correct. In Machine Design viva and GATE descriptive questions, listing valid assumptions often earns separate marks.
Step-by-step problem approach
1. Read the question and list given data with SI units (common in Machine Design papers).
2. Draw a neat labelled diagram where applicable — examiners in Indian universities award diagram marks even when arithmetic slips.
3. Identify which relation from this topic applies to design review interviews.
4. Use equation 1: Answer frame: Requirement → Options → Selection reason → Trade-offs.
5. Use equation 2: .
6. Substitute values, compute, and verify units and sign (direction).
7. State conclusion in one line — e.g. safe/unsafe, stable/unstable, feasible/infeasible.
2. Draw a neat labelled diagram where applicable — examiners in Indian universities award diagram marks even when arithmetic slips.
3. Identify which relation from this topic applies to design review interviews.
4. Use equation 1: Answer frame: Requirement → Options → Selection reason → Trade-offs.
5. Use equation 2: .
6. Substitute values, compute, and verify units and sign (direction).
7. State conclusion in one line — e.g. safe/unsafe, stable/unstable, feasible/infeasible.
Applications & exam relevance
Design Review Interviews appears in shafts, keys, bearings, springs, gears, and fasteners. In Indian mechanical curricula this topic is tested because it connects theory to safe sizing of mechanical components.
GATE and semester exams often combine design review interviews with earlier units — revise prerequisites before attempting mixed problems.
Industry interview panels sometimes ask: "Where did you use design review interviews?" — answer with a lab, mini-project, or plant visit example if possible.
Common mistakes in exams
• Answering with only “as per standard” and no requirement/options/trade-off
• Defending thickness with no load case
• Ignoring manufacturability or inspection
• Treating fatigue, buckling, and static yield as the same check
• Defending thickness with no load case
• Ignoring manufacturability or inspection
• Treating fatigue, buckling, and static yield as the same check
Quick revision checklist
Before attempting design review interviews problems, confirm you can:
1. Interviewers test engineering judgment — material, thickness, process, cost, safety — not only calculations
2. Always compare at least one serious alternative and name the trade-off you accepted
3. Separate strength-driven choices from manufacturability-driven choices
4. Cite standards when relevant (IS / ISO / ASME / AWS) and name the governing failure mode
2. Always compare at least one serious alternative and name the trade-off you accepted
3. Separate strength-driven choices from manufacturability-driven choices
4. Cite standards when relevant (IS / ISO / ASME / AWS) and name the governing failure mode
Revise the solved examples in Design of Machine Elements — VB Bhandari and one previous-year GATE or university paper for this unit.
Detailed conceptual understanding
Design Review Interviews should be studied as a complete reasoning chain: definition, governing assumptions, physical interpretation, boundary conditions, and limits of validity. In machine design, strong students do not stop at "what is the formula"; they explain why the model applies, which simplifications are being used, and what error appears when those simplifications break. This is the key difference between memorized learning and engineering understanding.
A high-quality conceptual pass should answer these questions in writing:
1. Which quantity is being predicted or controlled?
2. Which variables dominate sensitivity and why?
3. Which assumptions are explicit, and which are hidden?
4. What real-world effects are neglected in first-pass analysis?
5. Which engineering decision depends on this output?
1. Which quantity is being predicted or controlled?
2. Which variables dominate sensitivity and why?
3. Which assumptions are explicit, and which are hidden?
4. What real-world effects are neglected in first-pass analysis?
5. Which engineering decision depends on this output?
When revising, rewrite the concept in your own words and attach one real scenario from lab, workshop, project, internship, or industry case. This habit transforms abstract theory into retrievable memory. If a topic cannot be explained without reading the page, it is not yet mastered.
Use this page as a note source: create a "concept map" with cause-effect arrows and keep updating it whenever you solve new problems. Students who maintain evolving concept maps typically retain topics longer and return less to emergency cramming.
Advanced problem-solving framework
Use this sequence for long-form mastery and repeatable scoring:
1. Identify objective, system boundary, and required output.
2. Write all givens in SI units and classify each as measured, assumed, or estimated.
3. Choose the governing model and relation (the key relation listed above) with one-line justification.
4. Solve symbolically first to catch structural mistakes early.
5. Substitute values with careful unit tracking.
6. Cross-check by sign, order of magnitude, and limiting case.
7. Write a short engineering conclusion tied to safety, performance, reliability, or cost.
1. Identify objective, system boundary, and required output.
2. Write all givens in SI units and classify each as measured, assumed, or estimated.
3. Choose the governing model and relation (the key relation listed above) with one-line justification.
4. Solve symbolically first to catch structural mistakes early.
5. Substitute values with careful unit tracking.
6. Cross-check by sign, order of magnitude, and limiting case.
7. Write a short engineering conclusion tied to safety, performance, reliability, or cost.
Next, solve one "variant version" of the same problem by changing one assumption (loading type, losses, property constancy, boundary condition, or uncertainty level). This builds transfer ability — essential for difficult exams where numbers and wording are changed deliberately.
Create a reusable answer template in your notes:
Given | Required | Model | Assumptions | Derivation | Substitution | Validation | Conclusion.
Using this structure repeatedly improves speed without reducing depth.
Given | Required | Model | Assumptions | Derivation | Substitution | Validation | Conclusion.
Using this structure repeatedly improves speed without reducing depth.
For viva/interviews, convert your written method into a 45-second explanation format:
"Objective -> model selected -> key assumption -> result -> practical implication."
This makes your answers concise and technically credible.
"Objective -> model selected -> key assumption -> result -> practical implication."
This makes your answers concise and technically credible.
Exam, interview, and note-making strategy
To make this topic genuinely reusable, maintain notes in four blocks: concept summary, assumptions checklist, solved template, and common error-correction logic. This transforms passive reading into active revision material for class tests, semester exams, GATE-style practice, and interviews.
A practical weekly cycle:
- Day 1: read and annotate the topic.
- Day 3: solve one moderate numerical from memory.
- Day 5: give a 60-second oral explanation.
- Day 7: solve one mixed problem integrating this topic with a prerequisite.
- Day 14: do a timed review to test retention.
- Day 1: read and annotate the topic.
- Day 3: solve one moderate numerical from memory.
- Day 5: give a 60-second oral explanation.
- Day 7: solve one mixed problem integrating this topic with a prerequisite.
- Day 14: do a timed review to test retention.
For interview readiness, prepare concise answers to:
1. Where is this used in real engineering?
2. Which assumption is most risky if wrong?
3. How do you sanity-check the result quickly?
4. What trade-off does this result influence?
1. Where is this used in real engineering?
2. Which assumption is most risky if wrong?
3. How do you sanity-check the result quickly?
4. What trade-off does this result influence?
These four questions are asked repeatedly in technical panels, and practicing them creates confidence.
Use this page as a living notebook: append class doubts, lab observations, previous-year tricks, and personal mnemonics. That personalization is what turns a study page into a repeat-visit resource students trust.
Industry scenarios and decision context
Engineering decisions are made under constraints: deadline, budget, material availability, process capability, safety requirements, and maintenance realities. So while solving design review interviews, do not treat the answer as "final truth" without context. The numerical output is a decision input, not the decision itself.
Ask these context questions after every solved example:
- If load uncertainty increases, does design margin remain acceptable?
- If manufacturing tolerance drifts, will performance degrade critically?
- If operating temperature/humidity changes, are properties still valid?
- If maintenance is delayed, what failure mode appears first?
- If load uncertainty increases, does design margin remain acceptable?
- If manufacturing tolerance drifts, will performance degrade critically?
- If operating temperature/humidity changes, are properties still valid?
- If maintenance is delayed, what failure mode appears first?
Students who practice contextual questioning develop judgment faster and perform better in internships, design tasks, and technical interviews. This context-first style is a major retention driver because learners see immediate real-world value.
Common misconceptions and correction patterns
Most weak performance comes from repeated misconception patterns, not from lack of intelligence. Typical patterns include unit inconsistency, wrong model selection, assumption mismatch, and skipping interpretation after substitution.
Correction pattern to practice:
1. Detect: identify exactly where logic diverged.
2. Diagnose: state why that step is invalid.
3. Repair: rewrite with correct model/assumption.
4. Verify: run a sanity check and compare trends.
1. Detect: identify exactly where logic diverged.
2. Diagnose: state why that step is invalid.
3. Repair: rewrite with correct model/assumption.
4. Verify: run a sanity check and compare trends.
Maintain a personal "mistake log" with three columns: mistake, reason, correction rule. Reviewing this log before exams has a larger performance impact than reading new theory repeatedly.
Use the same correction discipline in interviews: acknowledge the slip, state corrected logic, and proceed. This demonstrates professional maturity and keeps the discussion positive even when you initially miss a step.
Long-form revision worksheet
Use this worksheet when preparing notes:
A) One-paragraph concept explanation in your own words.
B) Symbol and units table for key variables.
C) Validity limits and assumptions list.
D) One standard solved pattern with all steps.
E) One variant problem where an assumption changes.
F) One industry-use explanation with failure consequence.
G) Three common mistakes and their correction rules.
A) One-paragraph concept explanation in your own words.
B) Symbol and units table for key variables.
C) Validity limits and assumptions list.
D) One standard solved pattern with all steps.
E) One variant problem where an assumption changes.
F) One industry-use explanation with failure consequence.
G) Three common mistakes and their correction rules.
If you can fill all seven blocks without external help, your topic depth is strong enough for repeat use and long retention. If not, revisit the corresponding section and strengthen the missing block.
This structured worksheet approach is intentionally longer than quick revision notes because it is designed for durable mastery. It supports exactly the product goal you mentioned: students should keep coming back because the page is complete enough to build serious notes.