Ask about this topic
Answers come from this page's notes only — no live AI, no extra API cost.
Core concept
Bending Stress in Beams
Pure bending of elastic beams gives the flexure formula.
31 min15 Interview8 GATEGATEInterview
What you'll learn in this topic
- 1Flexure formula: .
- 2Bending stress: ; with .
- 3Neutral axis passes through centroid for pure bending (no axial force).
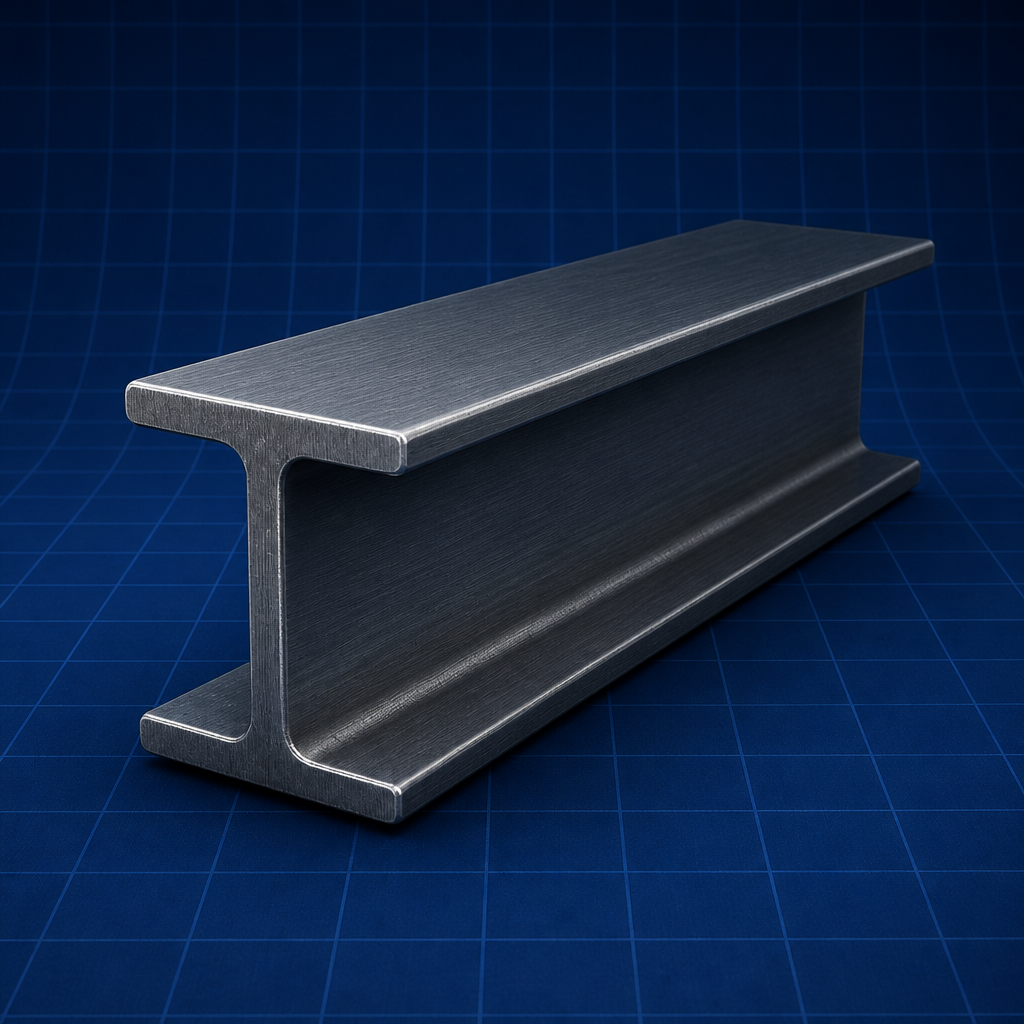
- 4Moment of inertia: rectangle ; circular .
Key Formulas
Important equations & their meanings
Worked Examples
Step-by-step solved problems
- 1Rectangular beam — max bending stress
- 2Section modulus design
- 3Eccentric axial load
Common Mistakes
Avoid these errors in exams & interviews
- Taking I about the wrong axis (not the NA / not the bending axis).
- Using y from the bottom fibre when NA is not at mid-depth (unsymmetric sections).
- Confusing Z=I/y with I itself in σ=M/Z.
Practice Questions
Strengthen your concepts with questions
23+Practice Questions
Interview Questions
Most asked interview problems
15Interview Questions
GATE Questions
Previous year GATE questions
8GATE Questions
Applications in real world
- BeamsFrames and structural members
- ShaftsTorsion and combined loading
- Pressure vesselsHoop and longitudinal stress
- Machine framesStiffness and strength checks
Visual concept
Problem
Model
Compute
Verify
Model the physics, compute, then verify against limits.
Recommended Book
Strength of MaterialsRK Bansal
Read: Ch. 9–10
University exams
Important Topic
Industry relevance
High
Concept difficulty
Hard
Average time
31 min
Core assumptions (theory of pure bending)
1. Beam is initially straight with a symmetric cross-section about the plane of bending (or load in a principal plane).
2. Material is homogeneous, isotropic, linear elastic.
3. Plane sections remain plane and normal to the deflected axis (Euler–Bernoulli).
4. Each longitudinal fibre is in uniaxial stress (lateral stresses neglected).
5. Young’s modulus same in tension and compression.
6. Beam is subjected to pure bending (or varies slowly — local application of flexure formula still used in strength of materials).
7. Deflections are small.
2. Material is homogeneous, isotropic, linear elastic.
3. Plane sections remain plane and normal to the deflected axis (Euler–Bernoulli).
4. Each longitudinal fibre is in uniaxial stress (lateral stresses neglected).
5. Young’s modulus same in tension and compression.
6. Beam is subjected to pure bending (or varies slowly — local application of flexure formula still used in strength of materials).
7. Deflections are small.
If axial force is also present, superpose .
Shear force, BM, and combined loading
Relate load , shear , moment :
Draw SFD and BMD to find at the critical section, then apply .
Draw SFD and BMD to find at the critical section, then apply .
Combined axial and bending (eccentric load at eccentricity ):
Step-by-step problem approach
1. Find support reactions; draw SFD/BMD; identify at the section of interest.
2. Locate centroid (NA) of the cross-section.
3. Compute about NA (use parallel-axis theorem if needed).
4. at required ; report tension/compression side.
5. For design: ; choose section.
6. Keep units consistent (N·mm and mm⁴ → N/mm² = MPa).
7. State pure-bending assumptions in exam answers.
2. Locate centroid (NA) of the cross-section.
3. Compute about NA (use parallel-axis theorem if needed).
4. at required ; report tension/compression side.
5. For design: ; choose section.
6. Keep units consistent (N·mm and mm⁴ → N/mm² = MPa).
7. State pure-bending assumptions in exam answers.
Advanced problem-solving framework
Use this sequence for long-form mastery and repeatable scoring:
1. Identify objective, system boundary, and required output.
2. Write all givens in SI units and classify each as measured, assumed, or estimated.
3. Choose the governing model and relation (Flexure formula:
4. Solve symbolically first to catch structural mistakes early.
5. Substitute values with careful unit tracking.
6. Cross-check by sign, order of magnitude, and limiting case.
7. Write a short engineering conclusion tied to safety, performance, reliability, or cost.
1. Identify objective, system boundary, and required output.
2. Write all givens in SI units and classify each as measured, assumed, or estimated.
3. Choose the governing model and relation (Flexure formula:
.) with one-line justification.
4. Solve symbolically first to catch structural mistakes early.
5. Substitute values with careful unit tracking.
6. Cross-check by sign, order of magnitude, and limiting case.
7. Write a short engineering conclusion tied to safety, performance, reliability, or cost.
Next, solve one "variant version" of the same problem by changing one assumption (loading type, losses, property constancy, boundary condition, or uncertainty level). This builds transfer ability — essential for difficult exams where numbers and wording are changed deliberately.
Create a reusable answer template in your notes:
Given | Required | Model | Assumptions | Derivation | Substitution | Validation | Conclusion.
Using this structure repeatedly improves speed without reducing depth.
Given | Required | Model | Assumptions | Derivation | Substitution | Validation | Conclusion.
Using this structure repeatedly improves speed without reducing depth.
For viva/interviews, convert your written method into a 45-second explanation format:
"Objective -> model selected -> key assumption -> result -> practical implication."
This makes your answers concise and technically credible.
"Objective -> model selected -> key assumption -> result -> practical implication."
This makes your answers concise and technically credible.
Exam, interview, and note-making strategy
To make this topic genuinely reusable, maintain notes in four blocks: concept summary, assumptions checklist, solved template, and common error-correction logic. This transforms passive reading into active revision material for class tests, semester exams, GATE-style practice, and interviews.
A practical weekly cycle:
- Day 1: read and annotate the topic.
- Day 3: solve one moderate numerical from memory.
- Day 5: give a 60-second oral explanation.
- Day 7: solve one mixed problem integrating this topic with a prerequisite.
- Day 14: do a timed review to test retention.
- Day 1: read and annotate the topic.
- Day 3: solve one moderate numerical from memory.
- Day 5: give a 60-second oral explanation.
- Day 7: solve one mixed problem integrating this topic with a prerequisite.
- Day 14: do a timed review to test retention.
For interview readiness, prepare concise answers to:
1. Where is this used in real engineering?
2. Which assumption is most risky if wrong?
3. How do you sanity-check the result quickly?
4. What trade-off does this result influence?
1. Where is this used in real engineering?
2. Which assumption is most risky if wrong?
3. How do you sanity-check the result quickly?
4. What trade-off does this result influence?
These four questions are asked repeatedly in technical panels, and practicing them creates confidence.
Use this page as a living notebook: append class doubts, lab observations, previous-year tricks, and personal mnemonics. That personalization is what turns a study page into a repeat-visit resource students trust.
Industry scenarios and decision context
Engineering decisions are made under constraints: deadline, budget, material availability, process capability, safety requirements, and maintenance realities. So while solving bending stress in beams, do not treat the answer as "final truth" without context. The numerical output is a decision input, not the decision itself.
Ask these context questions after every solved example:
- If load uncertainty increases, does design margin remain acceptable?
- If manufacturing tolerance drifts, will performance degrade critically?
- If operating temperature/humidity changes, are properties still valid?
- If maintenance is delayed, what failure mode appears first?
- If load uncertainty increases, does design margin remain acceptable?
- If manufacturing tolerance drifts, will performance degrade critically?
- If operating temperature/humidity changes, are properties still valid?
- If maintenance is delayed, what failure mode appears first?
Students who practice contextual questioning develop judgment faster and perform better in internships, design tasks, and technical interviews. This context-first style is a major retention driver because learners see immediate real-world value.
Long-form revision worksheet
Use this worksheet when preparing notes:
A) One-paragraph concept explanation in your own words.
B) Symbol and units table for key variables.
C) Validity limits and assumptions list.
D) One standard solved pattern with all steps.
E) One variant problem where an assumption changes.
F) One industry-use explanation with failure consequence.
G) Three common mistakes and their correction rules.
A) One-paragraph concept explanation in your own words.
B) Symbol and units table for key variables.
C) Validity limits and assumptions list.
D) One standard solved pattern with all steps.
E) One variant problem where an assumption changes.
F) One industry-use explanation with failure consequence.
G) Three common mistakes and their correction rules.
If you can fill all seven blocks without external help, your topic depth is strong enough for repeat use and long retention. If not, revisit the corresponding section and strengthen the missing block.
This structured worksheet approach is intentionally longer than quick revision notes because it is designed for durable mastery. It supports exactly the product goal you mentioned: students should keep coming back because the page is complete enough to build serious notes.
Definition and physical meaning
Bending produces curvature of the beam axis. Longitudinal fibres above/below the neutral axis (NA) shorten or elongate, causing normal bending stresses.
Flexure (bending) formula for elastic pure bending:
Hence
Physical parameters
Symbol | Meaning | SI unit |
|---|---|---|
Bending moment | ||
Second moment of area about NA | ||
Distance from NA | ||
Bending stress | ||
Section modulus | ||
Young’s modulus | ||
Radius of curvature | ||
Flexural rigidity |
Sign convention (common textbook): sagging → compression on top fibres, tension on bottom (simply supported beam with downward load).
Core assumptions (theory of pure bending)
1. Beam is initially straight with a symmetric cross-section about the plane of bending (or load in a principal plane).
2. Material is homogeneous, isotropic, linear elastic.
3. Plane sections remain plane and normal to the deflected axis (Euler–Bernoulli).
4. Each longitudinal fibre is in uniaxial stress (lateral stresses neglected).
5. Young’s modulus same in tension and compression.
6. Beam is subjected to pure bending (or varies slowly — local application of flexure formula still used in strength of materials).
7. Deflections are small.
2. Material is homogeneous, isotropic, linear elastic.
3. Plane sections remain plane and normal to the deflected axis (Euler–Bernoulli).
4. Each longitudinal fibre is in uniaxial stress (lateral stresses neglected).
5. Young’s modulus same in tension and compression.
6. Beam is subjected to pure bending (or varies slowly — local application of flexure formula still used in strength of materials).
7. Deflections are small.
If axial force is also present, superpose .
Derivation summary
Kinematics. For curvature , longitudinal strain at distance from NA:
(NA fibre undeformed: ).
(NA fibre undeformed: ).
Constitutive.
— linear stress distribution.
Equilibrium. Axial force resultant zero for pure bending:
Moment resultant:
Therefore
Moment resultant:
Therefore
.
Section modulus and common I values
Section modulus
Larger → stronger section for same material and .
Larger → stronger section for same material and .
**Useful **
Section | about centroidal axis |
|---|---|
Rectangle (bend about axis ∥ ) | |
Circular diameter | |
Hollow circular | |
Triangular (base , height ) |
Parallel-axis theorem for built-up sections:
after locating the composite centroid.
after locating the composite centroid.
Shear force, BM, and combined loading
Relate load , shear , moment :
Draw SFD and BMD to find at the critical section, then apply .
Draw SFD and BMD to find at the critical section, then apply .
Combined axial and bending (eccentric load at eccentricity ):
Fundamentals: flitched beams and strength of a section (Bansal Ch. 7)
Flitched (composite) beam — e.g. timber beam strengthened with steel plates bolted so that they bend together:
- Strain varies linearly with (same ).
- Stress in each material
- Total moment
- Transformed-section method: replace steel by equivalent timber width scaled by (or vice versa), then use a single .
- Strain varies linearly with (same ).
- Stress in each material
.
- Total moment
so use equivalent flexural rigidity .
- Transformed-section method: replace steel by equivalent timber width scaled by (or vice versa), then use a single .
Moment of resistance / strength of a section: maximum the section can carry at allowable extreme-fibre stress,
.
Concept: kernel (core) of a section (Bansal Ch. 9)
For a short compression member, if the load stays inside the kernel, the entire section remains in compression (no tension).
Rectangle : middle-third rule — kernel is a rhombus/diamond with vertices at and from the centre on the principal axes.
Solid circle diameter : middle-quarter — kernel is a circle of diameter .
Hollow sections: smaller kernels; derive from .
Solid circle diameter : middle-quarter — kernel is a circle of diameter .
Hollow sections: smaller kernels; derive from .
This bridges SOM bending and foundation/column design (also see Machine Design static load topic).
Step-by-step problem approach
1. Find support reactions; draw SFD/BMD; identify at the section of interest.
2. Locate centroid (NA) of the cross-section.
3. Compute about NA (use parallel-axis theorem if needed).
4. at required ; report tension/compression side.
5. For design: ; choose section.
6. Keep units consistent (N·mm and mm⁴ → N/mm² = MPa).
7. State pure-bending assumptions in exam answers.
2. Locate centroid (NA) of the cross-section.
3. Compute about NA (use parallel-axis theorem if needed).
4. at required ; report tension/compression side.
5. For design: ; choose section.
6. Keep units consistent (N·mm and mm⁴ → N/mm² = MPa).
7. State pure-bending assumptions in exam answers.
Common mistakes in exams
• Taking about the wrong axis (not the NA / not the bending axis).
• Using from the bottom fibre when NA is not at mid-depth (unsymmetric sections).
• Confusing with itself in .
• Forgetting parallel-axis for I-beams / built-up sections.
• Mixing (polar) with (bending).
• Wrong sign of tension/compression relative to BMD convention.
• Using from the bottom fibre when NA is not at mid-depth (unsymmetric sections).
• Confusing with itself in .
• Forgetting parallel-axis for I-beams / built-up sections.
• Mixing (polar) with (bending).
• Wrong sign of tension/compression relative to BMD convention.
Detailed conceptual understanding
Bending Stress in Beams should be studied as a complete reasoning chain: definition, governing assumptions, physical interpretation, boundary conditions, and limits of validity. In som, strong students do not stop at "what is the formula"; they explain why the model applies, which simplifications are being used, and what error appears when those simplifications break. This is the key difference between memorized learning and engineering understanding.
A high-quality conceptual pass should answer these questions in writing:
1. Which quantity is being predicted or controlled?
2. Which variables dominate sensitivity and why?
3. Which assumptions are explicit, and which are hidden?
4. What real-world effects are neglected in first-pass analysis?
5. Which engineering decision depends on this output?
1. Which quantity is being predicted or controlled?
2. Which variables dominate sensitivity and why?
3. Which assumptions are explicit, and which are hidden?
4. What real-world effects are neglected in first-pass analysis?
5. Which engineering decision depends on this output?
When revising, rewrite the concept in your own words and attach one real scenario from lab, workshop, project, internship, or industry case. This habit transforms abstract theory into retrievable memory. If a topic cannot be explained without reading the page, it is not yet mastered.
Use this page as a note source: create a "concept map" with cause-effect arrows and keep updating it whenever you solve new problems. Students who maintain evolving concept maps typically retain topics longer and return less to emergency cramming.
Advanced problem-solving framework
Use this sequence for long-form mastery and repeatable scoring:
1. Identify objective, system boundary, and required output.
2. Write all givens in SI units and classify each as measured, assumed, or estimated.
3. Choose the governing model and relation (Flexure formula:
4. Solve symbolically first to catch structural mistakes early.
5. Substitute values with careful unit tracking.
6. Cross-check by sign, order of magnitude, and limiting case.
7. Write a short engineering conclusion tied to safety, performance, reliability, or cost.
1. Identify objective, system boundary, and required output.
2. Write all givens in SI units and classify each as measured, assumed, or estimated.
3. Choose the governing model and relation (Flexure formula:
.) with one-line justification.
4. Solve symbolically first to catch structural mistakes early.
5. Substitute values with careful unit tracking.
6. Cross-check by sign, order of magnitude, and limiting case.
7. Write a short engineering conclusion tied to safety, performance, reliability, or cost.
Next, solve one "variant version" of the same problem by changing one assumption (loading type, losses, property constancy, boundary condition, or uncertainty level). This builds transfer ability — essential for difficult exams where numbers and wording are changed deliberately.
Create a reusable answer template in your notes:
Given | Required | Model | Assumptions | Derivation | Substitution | Validation | Conclusion.
Using this structure repeatedly improves speed without reducing depth.
Given | Required | Model | Assumptions | Derivation | Substitution | Validation | Conclusion.
Using this structure repeatedly improves speed without reducing depth.
For viva/interviews, convert your written method into a 45-second explanation format:
"Objective -> model selected -> key assumption -> result -> practical implication."
This makes your answers concise and technically credible.
"Objective -> model selected -> key assumption -> result -> practical implication."
This makes your answers concise and technically credible.
Exam, interview, and note-making strategy
To make this topic genuinely reusable, maintain notes in four blocks: concept summary, assumptions checklist, solved template, and common error-correction logic. This transforms passive reading into active revision material for class tests, semester exams, GATE-style practice, and interviews.
A practical weekly cycle:
- Day 1: read and annotate the topic.
- Day 3: solve one moderate numerical from memory.
- Day 5: give a 60-second oral explanation.
- Day 7: solve one mixed problem integrating this topic with a prerequisite.
- Day 14: do a timed review to test retention.
- Day 1: read and annotate the topic.
- Day 3: solve one moderate numerical from memory.
- Day 5: give a 60-second oral explanation.
- Day 7: solve one mixed problem integrating this topic with a prerequisite.
- Day 14: do a timed review to test retention.
For interview readiness, prepare concise answers to:
1. Where is this used in real engineering?
2. Which assumption is most risky if wrong?
3. How do you sanity-check the result quickly?
4. What trade-off does this result influence?
1. Where is this used in real engineering?
2. Which assumption is most risky if wrong?
3. How do you sanity-check the result quickly?
4. What trade-off does this result influence?
These four questions are asked repeatedly in technical panels, and practicing them creates confidence.
Use this page as a living notebook: append class doubts, lab observations, previous-year tricks, and personal mnemonics. That personalization is what turns a study page into a repeat-visit resource students trust.
Industry scenarios and decision context
Engineering decisions are made under constraints: deadline, budget, material availability, process capability, safety requirements, and maintenance realities. So while solving bending stress in beams, do not treat the answer as "final truth" without context. The numerical output is a decision input, not the decision itself.
Ask these context questions after every solved example:
- If load uncertainty increases, does design margin remain acceptable?
- If manufacturing tolerance drifts, will performance degrade critically?
- If operating temperature/humidity changes, are properties still valid?
- If maintenance is delayed, what failure mode appears first?
- If load uncertainty increases, does design margin remain acceptable?
- If manufacturing tolerance drifts, will performance degrade critically?
- If operating temperature/humidity changes, are properties still valid?
- If maintenance is delayed, what failure mode appears first?
Students who practice contextual questioning develop judgment faster and perform better in internships, design tasks, and technical interviews. This context-first style is a major retention driver because learners see immediate real-world value.
Common misconceptions and correction patterns
Most weak performance comes from repeated misconception patterns, not from lack of intelligence. Typical patterns include unit inconsistency, wrong model selection, assumption mismatch, and skipping interpretation after substitution.
Correction pattern to practice:
1. Detect: identify exactly where logic diverged.
2. Diagnose: state why that step is invalid.
3. Repair: rewrite with correct model/assumption.
4. Verify: run a sanity check and compare trends.
1. Detect: identify exactly where logic diverged.
2. Diagnose: state why that step is invalid.
3. Repair: rewrite with correct model/assumption.
4. Verify: run a sanity check and compare trends.
Maintain a personal "mistake log" with three columns: mistake, reason, correction rule. Reviewing this log before exams has a larger performance impact than reading new theory repeatedly.
Use the same correction discipline in interviews: acknowledge the slip, state corrected logic, and proceed. This demonstrates professional maturity and keeps the discussion positive even when you initially miss a step.
Long-form revision worksheet
Use this worksheet when preparing notes:
A) One-paragraph concept explanation in your own words.
B) Symbol and units table for key variables.
C) Validity limits and assumptions list.
D) One standard solved pattern with all steps.
E) One variant problem where an assumption changes.
F) One industry-use explanation with failure consequence.
G) Three common mistakes and their correction rules.
A) One-paragraph concept explanation in your own words.
B) Symbol and units table for key variables.
C) Validity limits and assumptions list.
D) One standard solved pattern with all steps.
E) One variant problem where an assumption changes.
F) One industry-use explanation with failure consequence.
G) Three common mistakes and their correction rules.
If you can fill all seven blocks without external help, your topic depth is strong enough for repeat use and long retention. If not, revisit the corresponding section and strengthen the missing block.
This structured worksheet approach is intentionally longer than quick revision notes because it is designed for durable mastery. It supports exactly the product goal you mentioned: students should keep coming back because the page is complete enough to build serious notes.